How does the Skoda camper van conversion module work?
Converting your Skoda Roomster, Skoda Yeti or Skoda Karoq into a functional camper van is faster than reading these instructions!
No tools required for installation
Installation time of less than 5 minutes
Simple to follow instructions
Telephone support available Mon-Fri
We recommend reading the full instructions here prior to using your module to ensure correct installation. You can also find a download link at the bottom of this page so that you can save or print the instructions for easy referral.
All Simple camper van conversion modules are supplied fully assembled and ready to use. No vehicle modifications or permanent fixings are required and installation takes less than 5 minutes. Simply lift the module out of the packaging and straight into the boot of your vehicle and you’re ready to go!
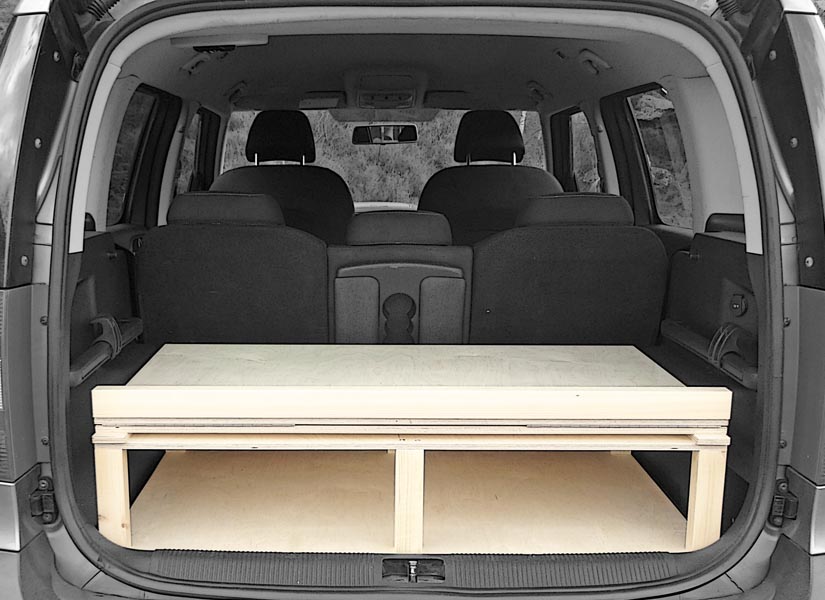
For everyday use, the camper van conversion module neatly folds into the boot of your car so that you can easily use all 5 seats as normal.
If you have any questions regarding installation of your Simple camper van conversion module then please get in touch. Telephone and email support is available from 10am-4pm Mon-Fri.
Installation instructions.
1. Configuring your vehicle ready for installation.
Before installing the camper van conversion module in your Skoda Roomster, Skoda Yeti or Skoda Karoq you will need to spend a few minutes configuring the front and rear seats to maximise internal space to allow the module to unfold. Once you’ve completed the process a few times, you will be able to configure your vehicle in a matter of seconds!
Start by lifting the front head restraints up (2-3cm is enough) so that the struts are exposed. Next, slide the front seats as far forward as possible on the runners – if the seats are difficult to slide, sit on each seat in turn and use your body weight to loosen the slide mechanism by moving the seat backwards and forwards a few times. Then, tilt the back rest on each front seat as far forward as possible using the circular winder on the side of the seat. Finally, use the base height lever to position the seat as high as possible by pulling the lever up until the seat is in its highest position. The front seats are now configured. You’ll also need to ensure that the central armrest is in its lowest position (if fitted to your vehicle).
To configure the rear seats, just ensure that each seat is in the default longitudinal position – pushed all the way towards the rear of the vehicle – then use the lever on the side of each seat to fold the back rest forward so that it rests on the seat base. That’s it. You are now ready to install your module!
2. Installing the module.
Carefully lift the module into the boot of your Skoda, noting the orientation as shown in the image. Due to the shape of the boot entrance, it is necessary to lift the module ~30cm above the height of the rear bumper before lowering it carefully onto the boot floor. Ensure that the installed module is pulled up against the boot entrance, rather than pushed forward into the vehicle.
For the Skoda Yeti only – If you are installing the Low Floor version (no spare wheel kit fitted), ensure that the module is not resting on the small metal fastening elements located at floor level on each side of the boot (there are 4 of these in total, 2 on each side). If your vehicle is fitted with the boot fastening bars with sliding hooks, rotate the hooks upwards as shown in the image, or remove them.

3. Folding out the module.
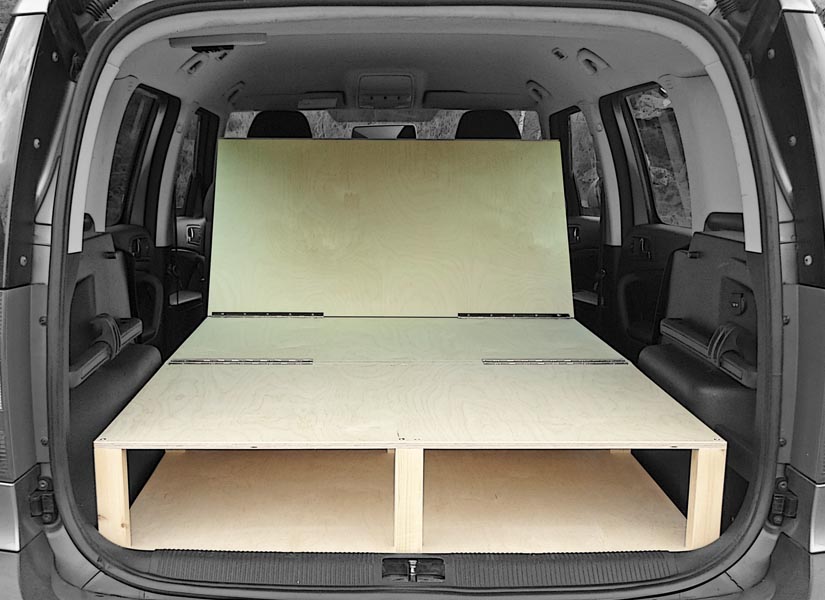
Ensure that the module is positioned centrally across the width of the vehicle boot so that the module can be unfolded without hitting the boot side panels. Carefully unfold the module so that it rests on top of the folded rear seats taking care not to drop the module panels, or to catch the module panels on the rear seat brackets, as they are unfolded.
4. Configuring the module in seating mode.
Unfold the module further and rest the support leg against the front head restraint struts.
Ensure that each front seat is positioned in exactly the same position so that the module support leg is supported evenly across both front seats.
The angle of the module back rest can be adjusted by tilting the vehicle front seats further backwards or forwards using the circular winder on the front seats.

5. Configuring the module in sleeping mode.
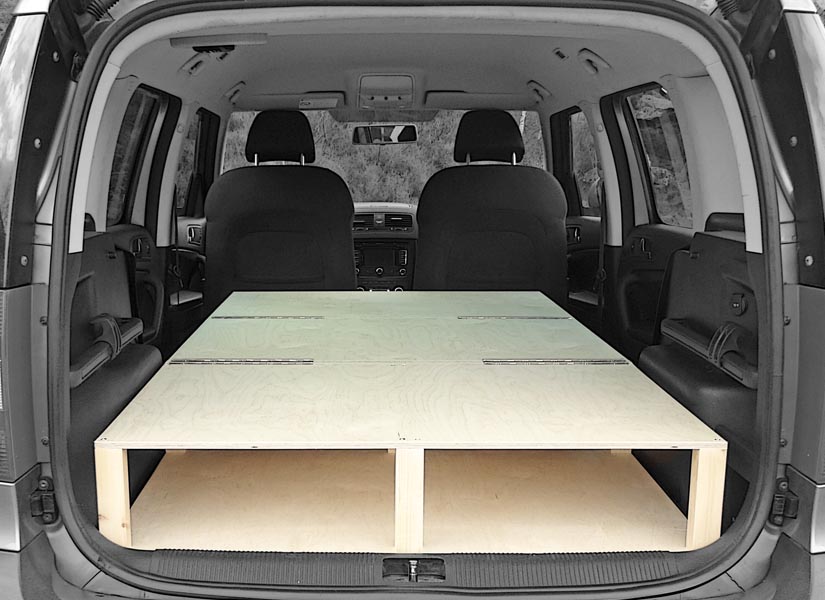
Fold the module flat by resting the support leg on the floor behind the front seats. If your vehicle is configured correctly, you should now have a completely flat sleeping platform. The angle of the support leg can be changed to allow minor adjustments.
If your vehicle is fitted with a central arm rest between the front seats, this should be in its lowest position to avoid the arm rest interfering with the module support leg.
You may also need to remove any floor mats from behind the front seats. The height of the support leg has been carefully designed to provide a completely flat sleeping platform without floor mats or other items artificially increasing the height of the vehicle floor.
We recommend sleeping with your feet facing the front of the vehicle. This allows the module to better support your weight and also allows much easier entry and exit using the side doors of the vehicle. Additionally, taller users can stretch out by placing their feet between the front seats of the vehicle when lying down.

Please note that when you are driving the vehicle, the camper van conversion module must be folded and stored in the boot of the vehicle.


